The Silent Mechanical Stress Beneath Your Stirrup Irons
Stirrup leathers are easy to overlook because they sit beneath the saddle flap and often appear sound from the outside. In use, however, they absorb repeated shock from rising trot, landing, jumping, mounting, and every correction made through the rider”s lower leg. The load is not purely downward. It is transferred through the stirrup iron, buckle, leather fold, saddle bar, and the rider”s body, often at changing angles. A leather that looks acceptable during a quick tack-room glance can already be losing its reserve strength.
Serious failures rarely happen without warning. Elongated holes, a brittle or spidered grain surface, softening around the buckle fold, pulled stitching, and a core that feels loose or uneven are structural clues. The inspection method below treats the stirrup leather as a working load-bearing component rather than a cosmetic accessory. It also follows the wider safety principle that regular cleaning and inspection should be part of routine tack care, particularly around sweat-exposed and stress-prone areas. For practical guidelines on riding safety, equipment inspection, and tack maintenance, consult this university extension guide and this Authoritative Source.
Anatomy of a Break and the Micro-Fractures in Corium Fibers
Full-grain leather has two important working zones. The grain side is the dense outer surface, where the original skin structure is most compact and resistant to abrasion. Beneath it lies the corium, sometimes called the fiber network or flesh structure. This interwoven collagen mesh provides much of the leather”s tensile strength. A polished surface can therefore be misleading. The grain may still look intact while the deeper fiber bundles have become dry, compressed, or partly separated.
Mounting is particularly hard on stirrup leathers because it produces an asymmetric load. When a rider places weight in one iron while mounting, the leather is pulled sharply around the saddle bar and buckle area. That force concentrates at the nearest adjustment hole and at the fold beneath the buckle. Repeated mounting from the same side can produce a familiar wear pattern: one leather develops more stretch, deeper creasing, or more pronounced hole elongation than the other. Shear forces then work across the punched hole rather than straight along the length of the strap.
Sweat adds another layer of damage. Salt and moisture enter the leather, then evaporate and leave mineral residue behind. Repeated wetting and drying can desiccate collagen bundles, reduce flexibility, and accelerate fatigue. Abrasion from the buckle tongue enlarges the hole mechanically, while dirt particles work into surface cracks during adjustment. This is why a leather can fail after apparently ordinary use rather than during one extraordinary incident. The final break is often the last stage of a long process of internal weakening.
The same diagnostic logic used in mechanical failure analysis applies here: service stress, material condition, geometry, and environment interact over time. A useful overview of fracture origins, stress concentration, and progressive material failure appears in this mechanical failure analysis resource. Leather is not plastic, but the practical lesson carries across materials. Visible parting is often preceded by microscopic damage at a hole, fold, stitch line, or sharp transition.
The Three-Point Workshop Inspection Protocol
A proper check takes only a few minutes, but the leathers must be removed from the saddle or at least fully unbuckled. Inspect them on a clean bench in good light. Do not rely on touching the exposed face only. Turn the strap, flex the fold, inspect both sides, and compare the left and right leathers against each other.
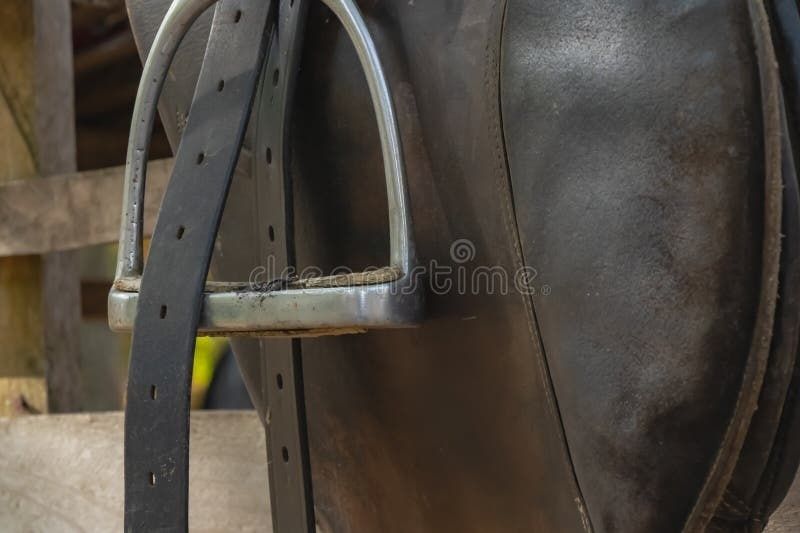
- Point one, perform the bend and roll test. Hold a clean section of leather between both hands and gently bend it grain-side outward, then inward. Roll the strap slightly across its width without sharply creasing it. Healthy leather should flex with a consistent, firm resistance. Fine surface lines may appear in an older strap, but dangerous damage shows as branching spider cracks, sharp white creases, flaking finish, or a crack that opens when the leather is bent. Run a fingertip across the surface. A rough ridge, soft pocket, or sudden change in thickness suggests localized fiber collapse.
- Point two, examine hole distortion and elongation. Look at every adjustment hole, not only the hole currently used. A sound hole remains reasonably rounded or evenly punched. A worn hole becomes oval in the direction of pull, develops torn edges, or shows a polished groove where the buckle tongue bears against it. Slight rounding may be normal after use, but substantial elongation means the leather is no longer distributing load through its original cross-section. If the hole is visibly stretched, the surrounding leather feels thin, or neighboring holes show the same damage, replacement is the safe decision.
- Point three, check stitching and buckle creep. Inspect the folded end where the buckle is attached. Look for loose threads, broken stitches, pulled holes, uneven spacing, and a fold that has migrated away from its original position. Buckle creep occurs when repeated loading gradually draws the folded section longer. The leather may feel soft and flattened rather than obviously torn. Examine the keeper loops as well, since a loose or damaged keeper can allow the strap to move unpredictably during adjustment. Any stitching that carries the buckle load should be treated as structural, not decorative.
Compare both leathers after completing the three points. A matched pair should not necessarily look identical, particularly when the rider mounts consistently from one side, but a significant difference deserves investigation. Check the saddle bars and stirrup irons too. Sharp metal edges, rough buckle tongues, incorrect adjustment, or a saddle that shifts can create abnormal loading and make a sound leather deteriorate rapidly.
Evaluating Tack Wear and Decision Matrix for Retirement
Dryness alone does not always mean a leather is unsafe. A surface may look dull and feel slightly firm while the fiber structure remains continuous. Light cleaning with a suitable leather product, followed by careful conditioning, can restore suppleness. Avoid soaking, petroleum products, household oils, and aggressive rubbing. Over-conditioning can be just as unhelpful as neglect because it may soften the fold excessively and leave dirt embedded in the surface.
Retirement is mandatory when the load-bearing area shows cracks that open under gentle flexing, torn or markedly elongated holes, a softened buckle fold, separated layers, broken structural stitching, or a core that shifts independently of the outer leather. Do not attempt to extend the life of a compromised stirrup leather with tape, adhesive, extra holes, or a new keeper. A repair may be appropriate for nonstructural cosmetic damage, but a qualified saddler should assess any repair involving the buckle end or adjustment holes.
| Inspection area | Acceptable wear | Retire immediately |
|---|---|---|
| Surface texture | Dull finish or light, closed creasing with firm fibers underneath | Spidering, flaking, open cracks, rough ridges, or soft pockets |
| Adjustment holes | Minor rounding with even surrounding thickness | Oval holes, torn edges, deep grooves, or progressive elongation |
| Buckle fold | Firm fold with even stitching and no movement | Softened fold, visible creep, pulled leather, or broken stitches |
| Core stability | Uniform resistance when bent and rolled gently | Loose layers, uneven thickness, delamination, or a shifting web core |
If the leathers pass the inspection, wipe away sweat and grit after riding, clean them according to the leather maker”s directions, and store them flat or naturally supported away from heat and damp plastic covers. Record the inspection date and any developing pattern, such as one side stretching faster than the other. A quarterly unbuckling inspection is a sensible minimum for regular riders, while daily or professional use may justify a monthly structural check.
Construction Standards That Resist Critical Failure
Traditional solid leather stirrup leathers, cut from heavy vegetable-tanned cowhide or oak-bark-tanned bridle butt, are valued for their dense fiber structure, controlled stretch, and substantial tensile yield strength. By contrast, supple calfskin lacks the thickness and mechanical resistance required to serve as a solid load-bearing strap on its own; instead, saddlers utilize calfskin as a soft outer wrap encased around an internal high-tensile nylon or synthetic webbing core. Modern lined designs rely on this interior core to limit stretch and stabilize the strap, but the construction does not make regular inspection unnecessary. Outer leather wraps can still crack, buckle stitching can still pull, and the internal webbing itself can be damaged by internal friction, abrasion, or heat.
Lined, non-stretch construction is particularly useful when consistent stirrup length matters. Uneven stretching can affect rider balance and may leave the left and right irons at different effective lengths even when the holes appear matched. Reinforced buckle areas, double stitching, smooth hardware, and well-finished hole edges all reduce stress concentration. When buying, inspect the transition around the buckle rather than judging quality only by softness or appearance.
- Choose construction appropriate to the discipline, rider weight, mounting habits, and frequency of use.
- Prefer cleanly finished holes and reinforced buckle areas over decorative thickness or excessive softness.
- Check that the webbing, if present, cannot be felt shifting independently inside the leather covering.
- Alternate the mounting side when practical and use a mounting block to reduce repeated torque.
- Rotate or alternate stirrup leathers only when both sides are compatible and correctly adjusted, then recheck length and wear patterns.
Mounting technique remains part of equipment care. Repeatedly pulling hard on one stirrup from the ground places a high load on a small section of leather. A block reduces that angle and helps protect the saddle, billets, and stirrup leather together. During tack checks, include the stirrup bars, irons, buckle tongues, and saddle balance so that the leather is not asked to compensate for another fitting problem.
Make Tactile Bench Checks Part of Your Routine Tack Care
The warning signals are straightforward once the leather is inspected properly. Elongated holes show that load is concentrating at the adjustment point. Surface spidering indicates repeated flexing and drying have compromised the grain. A soft or creeping buckle fold suggests that the end carrying the iron is losing its stable shape. Loose stitching, a shifting core, and uneven stretch strengthen the case for immediate replacement.
Set aside a quarterly bench-level check in which both leathers are removed, cleaned, unbuckled, flexed, and compared. Increase the frequency for school horses, competition horses, riders who mount from the ground, or tack exposed to heavy sweat, dust, rain, and temperature changes. When damage is uncertain, place safety ahead of economy. Stirrup leathers are relatively simple to replace, while a failure during mounting, jumping, or fast work can injure both horse and rider. The reliable rule is plain: if a load-bearing area feels structurally doubtful, retire the leather early and fit a sound replacement before the next ride.